
Introduction
A marine heat exchanger leak can reduce cooling efficiency, cause engine overheating, and allow seawater, coolant, or oil to mix between separate circuits. Identifying the leak early helps prevent corrosion, equipment damage, and unexpected marine system failures.
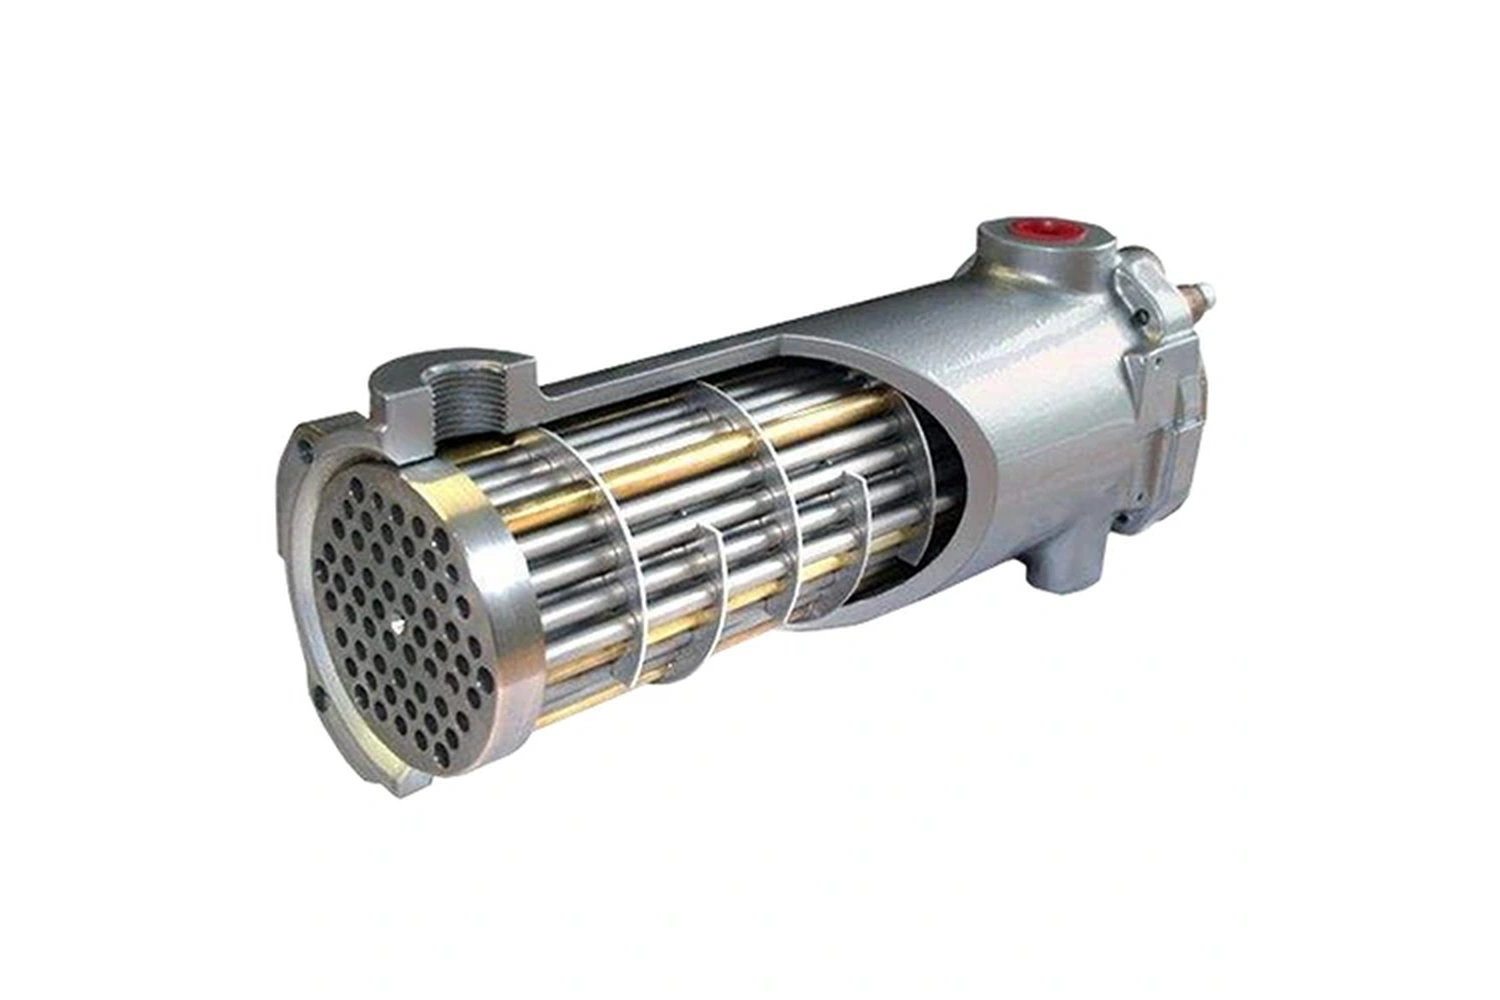
At Heat Transfer Equipments Pvt Ltd., we design and manufacture reliable marine heat exchangers for engine cooling, oil cooling, and other marine applications. In this guide, we explain how to find a leak in a marine heat exchanger using visual inspection, pressure testing, and other diagnostic methods.
Understanding common leak symptoms, failure causes, and testing procedures helps operators identify damaged tubes, failed gaskets, and sealing problems before they affect critical marine equipment.
Signs of a Leaking Marine Heat Exchanger
A leaking marine heat exchanger can cause engine overheating, coolant loss, fluid contamination, and reduced cooling performance. Common warning signs include milky engine oil, white exhaust smoke, coolant level changes, and visible leaks around gaskets or end covers.
Detecting these symptoms early helps prevent further damage to the marine cooling system and connected engine components.
1. Engine Overheating
Engine overheating is one of the earliest signs of a marine heat exchanger leak. A leak can reduce coolant circulation and prevent the exchanger from removing heat effectively.
Symptoms:
- Engine temperature rises under load
- Cooling performance decreases
- High-temperature alarms occur
- Engine requires frequent coolant top-ups
Cause:
A damaged gasket, seal, or internal passage can allow coolant loss and reduce the efficiency of heat transfer. When the cooling system cannot remove enough heat, the engine may overheat during heavy operation.
2. Cross-Contamination of Fluids
Fluid contamination occurs when a damaged marine heat exchanger allows seawater, coolant, or oil to mix between separate circuits.
Symptoms:
- Coolant level drops without visible external leakage
- Engine oil becomes milky or frothy
- Seawater appears in the coolant system
Cause:
Cracked tubes, worn seals, or damaged internal barriers can allow fluids to cross between the cooling passages. This can lead to corrosion and reduced cooling system performance.
3. Abnormal Exhaust Smoke
White or thick exhaust smoke may indicate coolant entering areas where it should not be present.
Symptoms:
- Increased white smoke
- Thick exhaust vapour
- Changes in engine performance
Cause:
A cooling system leak can allow coolant loss and may affect engine operation. Further inspection is required because exhaust smoke can also have other causes.
4. External Drips and Leaking End Caps
Visible leaks around end caps, gaskets, and connections are common external signs of marine heat exchanger failure.
Symptoms:
- Wet spots near the exchanger
- Salt deposits
- Coolant or water drips
- Leakage around gasket areas
Cause:
External leaks may result from damaged gaskets, loose connections, corrosion, or ageing sealing components.
How to Verify the Leak?
After identifying leak symptoms, the exact source should be confirmed through proper inspection and leak testing.
Methods may include:
- Visual inspection
- Pressure testing
- Checking for fluid contamination
- Inspecting seals and internal components
Common Causes of Marine Heat Exchanger Leaks
Marine heat exchanger leaks are mainly caused by corrosion, erosion, vibration, fouling, thermal stress, and gasket failure. These problems can damage tubes, seals, and joints, allowing seawater, coolant, or oil to mix between circuits.
Saltwater Corrosion
Continuous seawater exposure can cause pitting and corrosion in heat exchanger tubes, eventually creating small leaks and fluid contamination.
Erosion Damage
High seawater velocity and suspended particles such as sand or silt can wear tube surfaces, especially near inlets and bends.
Flow-Induced Vibration
Continuous vibration from engine operation can weaken tube joints and connections, leading to cracks and leakage.
Thermal Stress
Repeated heating and cooling cycles can create stress on tubes, joints, and seals, causing fatigue damage over time.
Fouling and Scaling
Marine growth, mineral deposits, and debris can restrict flow and increase corrosion risk inside the heat exchanger.
Galvanic Corrosion
Contact between different metals in seawater can accelerate corrosion if sacrificial anodes are not properly maintained.
Gasket and Seal Failure
Aged or damaged gaskets can lose sealing ability, causing external leaks or allowing fluids to mix.
Preventing Marine Heat Exchanger Leaks
Regular inspection, cleaning, and maintenance help prevent leaks. Replace worn anodes, remove deposits, check seals, and maintain proper operating conditions to extend heat exchanger life.
How to Check a Marine Heat Exchanger for Leaks?
A marine heat exchanger leak can be confirmed by performing a pressure test. The process involves isolating the exchanger, applying controlled pressure, and checking for pressure loss or visible bubbles to locate damaged tubes, seals, or gaskets.
Step-by-Step Leak Check Procedure
1. Isolate and Remove the Heat Exchanger
Close the seacock to stop seawater flow.
Disconnect coolant and raw water connections.
Drain both fluid circuits completely before testing.
2. Perform a Pressure Test
Seal one side of the heat exchanger and connect a pressure pump with a gauge. Apply pressure according to the manufacturer's specifications. Avoid exceeding the rated pressure, as this may damage tubes or seals.
3. Detect the Leak
Use these methods:
Pressure Gauge Test:
Monitor pressure for a set period. A pressure drop indicates a possible internal leak.
Bubble Test:
Submerge the exchanger in water or apply a soapy solution to connections and joints. Continuous bubbles can reveal the leak location.
4. Identify the Source of Damage
Leaks around end covers usually indicate damaged gaskets, seals, or O-rings.
Internal leaks often point to cracked or corroded tubes.
Damaged tubes may sometimes be temporarily plugged if allowed by the manufacturer.
Troubleshooting After Testing
If the heat exchanger holds pressure but coolant loss or fluid contamination continues, inspect gaskets, sealing surfaces, and end covers for damage. Replacing worn seals and cleaning contact areas can help restore proper sealing.
How to Find Which Tube Is Leaking in a Marine Heat Exchanger
To identify a leaking tube in a marine heat exchanger, isolate the unit, remove the end covers, and perform a pressure or bubble test. Air or water pressure applied to one circuit will reveal the damaged tube by creating bubbles or visible leakage at the tube ends.
Step-by-Step Tube Leak Detection
1. Isolate and Drain the Heat Exchanger
Shut off seawater and coolant flow.
Drain both fluid circuits completely.
Remove the exchanger if required for inspection.
2. Remove End Covers
Remove the water box covers to expose the tube sheet and tube ends. Clean and dry the tube sheet surface so small leaks can be identified easily.
3. Apply Pressure Test
Apply controlled air or water pressure to one side of the heat exchanger. Follow the manufacturer's recommended test pressure to avoid damaging tubes or seals.
4. Locate the Leaking Tube
Apply a soapy water solution around the exposed tube ends. Continuous bubbles indicate a damaged tube. Mark the leaking tube for repair or replacement.
Advanced Tube Leak Detection Methods
For small or difficult-to-find leaks, additional methods may include:
Hydrostatic testing: Uses water pressure to identify leaking tubes.
Vacuum testing: Helps detect very small leaks using vacuum and tracer methods.
Repairing a Leaking Heat Exchanger Tube
A damaged tube may sometimes be isolated by installing tube plugs at both ends. Use compatible plug materials to avoid corrosion problems.
However, plugging too many tubes can reduce heat transfer performance. If a large number of tubes are damaged, retubing or replacing the heat exchanger may be required.
Marine Heat Exchanger Leak Testing Methods
Marine heat exchanger leak testing methods help identify damaged tubes, failed seals, and internal fluid leaks. Common testing techniques include hydrostatic testing, pneumatic pressure testing, tracer gas testing, dye testing, and conductivity testing for plate heat exchangers.
The correct method depends on the heat exchanger design, leak size, and type of failure being investigated.
1. Hydrostatic Testing
Hydrostatic testing uses water pressure to check whether a marine heat exchanger can maintain pressure without leakage.
Procedure:
Drain and isolate the heat exchanger.
Fill one circuit with water.
Apply controlled pressure according to testing requirements.
Monitor pressure loss and inspect joints, tubesheets, and gaskets.
Best For:
Detecting larger leaks
Checking structural integrity
Shell-and-tube heat exchanger testing
2. Pneumatic Pressure Testing
Pneumatic testing uses compressed air to locate small leaks, especially damaged tubes or joints.
Procedure:
Drain the exchanger completely.
Apply controlled air pressure to one side.
Apply a soap solution around tube ends or connections.
Observe bubbles indicating leakage.
Best For:
Finding specific leaking tubes
Tube leak detection before plugging
3. Tracer Gas Leak Testing
Tracer gas testing uses gases such as helium or hydrogen mixtures to detect very small leaks that pressure tests may miss.
Procedure:
Introduce tracer gas into one circuit.
Scan the opposite side using detection equipment.
Identify escaping gas from cracks or pinholes.
Best For:
Detecting microscopic leaks
Finding early tube damage
4. Dye Penetrant Testing
Dye testing helps identify visible cracks, pinholes, and surface defects in heat exchanger components.
Procedure:
Apply dye to the inspection area.
Allow the dye to enter cracks.
Use visual inspection or UV light to locate defects.
Best For:
Plate heat exchangers
Tube sheets
Surface crack detection
5. Conductivity Testing for Plate Heat Exchangers
Conductivity testing detects fluid mixing by identifying changes in electrical conductivity between separate circuits.
Procedure:
Introduce a saline solution into one circuit.
Monitor conductivity changes in the other circuit.
Increased conductivity indicates cross-contamination.
Best For:
Detecting internal leaks in plate heat exchangers
Testing without complete disassembly
What Happens When a Marine Heat Exchanger Leaks?
When a marine heat exchanger leaks, seawater and coolant can mix, reducing cooling performance and causing engine overheating. A failed tube, gasket, or internal barrier may allow fluid cross-contamination, leading to corrosion, contaminated oil, and possible engine damage.
Common Consequences of a Marine Heat Exchanger Leak
Engine Overheating
A leaking heat exchanger can reduce coolant levels and prevent proper heat transfer. Without sufficient cooling, the marine engine temperature may rise, especially under heavy load.
Coolant or Oil Contamination
When seawater enters the coolant or oil system, it can create fluid contamination. Milky or frothy oil is a common warning sign and may damage bearings and internal engine components if ignored.
Corrosion Damage
Seawater inside a freshwater cooling system can accelerate corrosion of metal components, cooling passages, and engine parts.
How to Diagnose a Marine Heat Exchanger Leak
Visual Inspection
Check for:
Milky oil on the dipstick or oil cap
White exhaust smoke or excessive steam
Coolant level changes
Visible leaks around the heat exchanger
Check the Coolant Reservoir
Continuous bubbles in the coolant expansion tank may indicate seawater entering the coolant circuit.
Pressure Testing
Pressure testing the marine heat exchanger can identify damaged tubes, failed seals, or internal leakage between fluid circuits.
What to Do If a Marine Heat Exchanger Is Leaking
Stop operating the engine if seawater contamination is suspected.
Replace contaminated oil and filters.
Flush the cooling system to remove salt and debris.
Repair damaged tubes or replace the heat exchanger if required.
Can a Leaking Marine Heat Exchanger Be Repaired?
Yes, a leaking marine heat exchanger can often be repaired if the damage is limited. Common repairs include replacing damaged gaskets, repairing sealing surfaces, or plugging individual leaking tubes. However, severely corroded or damaged units may require replacement.
Common Marine Heat Exchanger Repair Methods
Plugging Leaking Tubes
If a damaged tube is causing internal leakage, technicians may seal the tube ends with suitable plugs to prevent seawater and coolant from mixing.
Tube plugging is usually considered a temporary or limited repair. If too many tubes are blocked, heat transfer performance may decrease.
Replacing Gaskets and Seals
Leaks around covers, joints, and connections are often caused by worn gaskets or damaged seals.
Repair usually involves:
- Removing old gaskets
- Cleaning sealing surfaces
- Installing new compatible gaskets or O-rings
- Checking for proper sealing
Repairing Corroded Surfaces
Corrosion around end covers, joints, or sealing areas may cause external leaks. Damaged surfaces can sometimes be restored, depending on the severity of corrosion.
When Should a Marine Heat Exchanger Be Replaced?
A marine heat exchanger may need replacement when:
- Tube corrosion is extensive
- Multiple tubes are damaged
- Internal leakage continues after repair
- The unit cannot maintain pressure
- Repair costs approach replacement cost
Severe corrosion or repeated leaks can reduce reliability, making replacement the safer long-term solution.
How to Prevent Marine Heat Exchanger Leaks?
Marine heat exchanger leaks can be prevented through regular inspection, cleaning, corrosion control, and proper maintenance of seals and cooling components. Maintaining anodes, controlling fouling, and checking for early signs of damage help extend heat exchanger service life.
1. Maintain Sacrificial Anodes
Sacrificial anodes protect marine heat exchanger components from galvanic corrosion.
Recommended practices:
- Inspect anodes regularly
- Replace worn zinc or aluminium anodes
- Keep anode mounting areas clean
- Ensure proper contact with the heat exchanger body
2. Control Fouling and Scale
Deposits inside the heat exchanger can restrict flow and increase corrosion risk.
Prevent problems by:
- Cleaning tubes and passages regularly
- Removing marine growth and sediment
- Flushing seawater circuits when required
3. Check Gaskets and Seals
Damaged gaskets and seals are common causes of external leaks.
Maintenance steps:
- Inspect gaskets for cracks or hardening
- Replace worn O-rings and seals
- Use materials compatible with seawater and coolant
4. Reduce Corrosion Risk
Corrosion prevention helps protect tubes, covers, and internal surfaces.
Important actions:
- Maintain proper bonding and electrical protection
- Avoid incompatible metals
- Monitor seawater conditions
5. Prevent Vibration and Thermal Stress
Continuous vibration and rapid temperature changes can weaken tubes and joints.
To reduce damage:
- Check mounting supports
- Inspect for excessive vibration
- Avoid sudden pressure changes during operation
Regular inspection, cleaning, and timely replacement of worn components can help prevent marine heat exchanger leaks and maintain reliable cooling performance.
Marine Heat Exchanger Leak vs Normal Cooling Problems
A marine heat exchanger leak occurs when seawater, coolant, or oil crosses between separate circuits due to damaged tubes, seals, or gaskets. Normal cooling problems reduce heat transfer or water flow but do not cause fluid mixing.
Key Differences Between a Leak and Cooling Problem
| Issue | Marine Heat Exchanger Leak | Normal Cooling Problem |
|---|---|---|
| Fluid condition | Coolant, seawater, or oil may become contaminated | Fluids remain separate and normal |
| Oil appearance | Milky or foamy oil may indicate water contamination | Oil condition remains unchanged |
| Coolant level | May decrease due to internal leakage | Usually remains stable |
| Temperature | Engine may overheat due to coolant loss | Engine may overheat due to restricted flow |
| Common causes | Damaged tubes, failed seals, corrosion | Blocked strainers, worn impeller, fouling |
Signs of a Marine Heat Exchanger Leak
Common leak symptoms include:
- Milky or frothy engine oil
- Seawater mixing with coolant
- Unexplained coolant loss
- White exhaust smoke
- Fluid contamination between cooling circuits
These signs usually indicate an internal failure that requires leak testing.
Signs of a Normal Cooling Problem
Cooling issues without a leak often involve:
- Reduced seawater flow
- Blocked sea strainer
- Damaged raw water pump impeller
- Marine growth or scale buildup
- Reduced heat transfer performance
In these cases, fluid levels remain normal and seawater does not mix with coolant or oil.
How to Diagnose the Difference
Check:
Fluid condition
Inspect engine oil and coolant for unusual colour, texture, or contamination.
Cooling flow
Check seawater discharge, strainers, and pump operation.
Pressure testing
If fluid contamination is present, perform a marine heat exchanger pressure test to locate internal leaks.
Corrective Actions
For Marine Heat Exchanger Leaks:
- Pressure test the exchanger
- Repair damaged tubes or seals
- Replace severely damaged units
For Normal Cooling Problems:
- Clean blocked passages
- Replace worn impellers
- Remove scale or marine deposits
Conclusion:
Finding a leak in a marine heat exchanger early helps prevent engine overheating, fluid contamination, corrosion, and costly equipment damage. Common warning signs such as coolant loss, seawater mixing with coolant, abnormal temperatures, and visible leakage should be investigated through proper inspection and leak testing methods.
At Heat Transfer Equipments Pvt Ltd., we manufacture reliable marine heat exchangers designed for efficient cooling performance in marine engines, generators, oil systems, and other onboard applications. Understanding leak causes, testing procedures, and repair options helps operators maintain dependable cooling systems and extend equipment service life.
Regular inspection, correct maintenance practices, and timely repairs ensure that marine heat exchangers continue to provide safe and efficient heat transfer in demanding marine environments.
FAQ
1.How do you test a marine heat exchanger for leaks?
A marine heat exchanger is tested for leaks using pressure testing, visual inspection, and fluid contamination checks. The exchanger is isolated, pressurized on one side, and monitored for pressure loss or visible leakage. Bubble testing, hydrostatic testing, or tracer methods may be used to locate damaged tubes, seals, or gasket failures.
2.Why is seawater getting into my coolant system?
Seawater usually enters a coolant system because of a damaged heat exchanger tube, failed gasket, cracked seal, or corrosion inside the exchanger. A leak allows seawater and coolant circuits to mix, which can cause coolant contamination, corrosion, reduced cooling performance, and engine overheating.
3.Can a marine heat exchanger leak internally?
Yes, a marine heat exchanger can leak internally when tubes, plates, seals, or gaskets become damaged. Internal leaks are difficult to see because fluid may pass between separate circuits without causing an external leak. Pressure testing is commonly used to identify internal tube failures and fluid cross-contamination.
4.How often should a marine heat exchanger be pressure tested?
A marine heat exchanger should be pressure tested based on operating conditions, maintenance history, and manufacturer recommendations. Testing is especially important when overheating, coolant loss, seawater contamination, or reduced cooling performance occurs. Regular inspection helps detect leaks before they cause major equipment damage.
5.Can damaged heat exchanger tubes be repaired?
Yes, damaged heat exchanger tubes can sometimes be repaired by plugging individual leaking tubes or replacing damaged components. However, repairs depend on the number and severity of damaged tubes. If corrosion or tube failure is extensive, retubing or replacing the heat exchanger may be the better long-term solution.